
Did you add a custom domain managed by CloudFlare to JotUrl (find out how to do it here) and want to install an SSL certificate?
WARNING: the following procedure only applies when your domain's "Proxy Status" has the "Proxied" flag enabled in correspondence with your domain's DNS record. If you see "DNS only" use the procedure described in this article:
- Use the following procedure if you see something like this:

- Use the procedure described in this article if you see something like this:

First of all you need to install an SSL certificate on CloudFlare:
-
Click on your domain name.
-
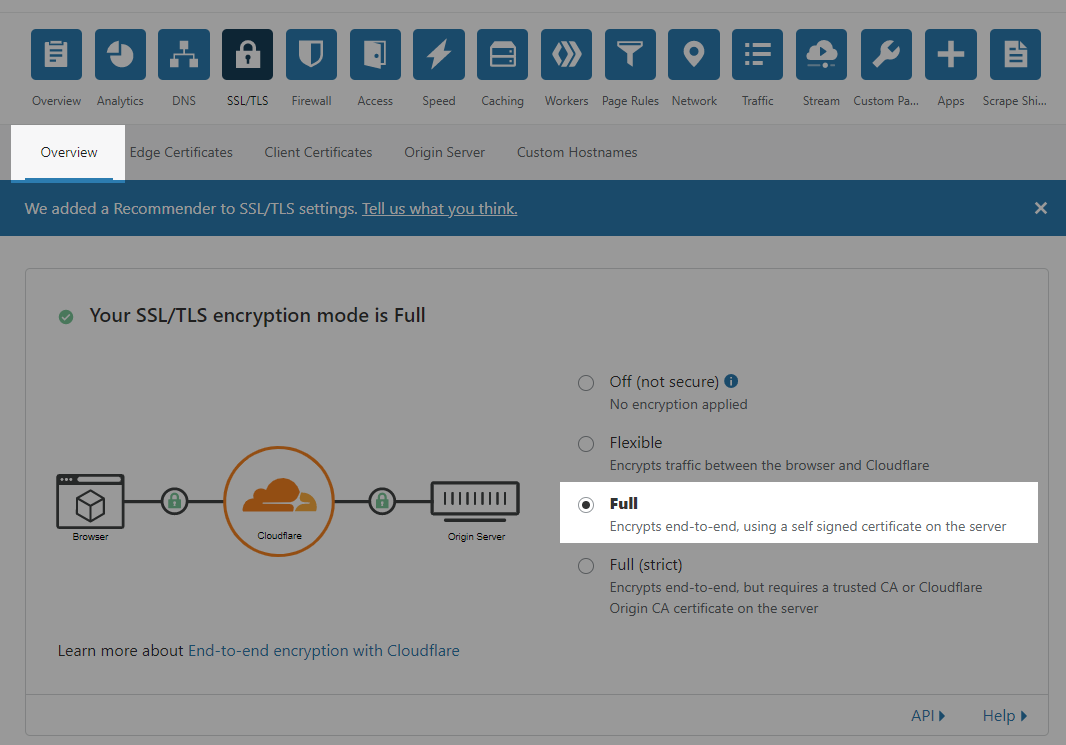
On the domain Details page, click on SSL/TLS:

- The Crypto settings page will open
- Click on the Overview tab and select Full or Full (strict) on the right
- Click on the Origin Server tab

- Click on Create certificate, please click on Help for details

- A configuration page will appear
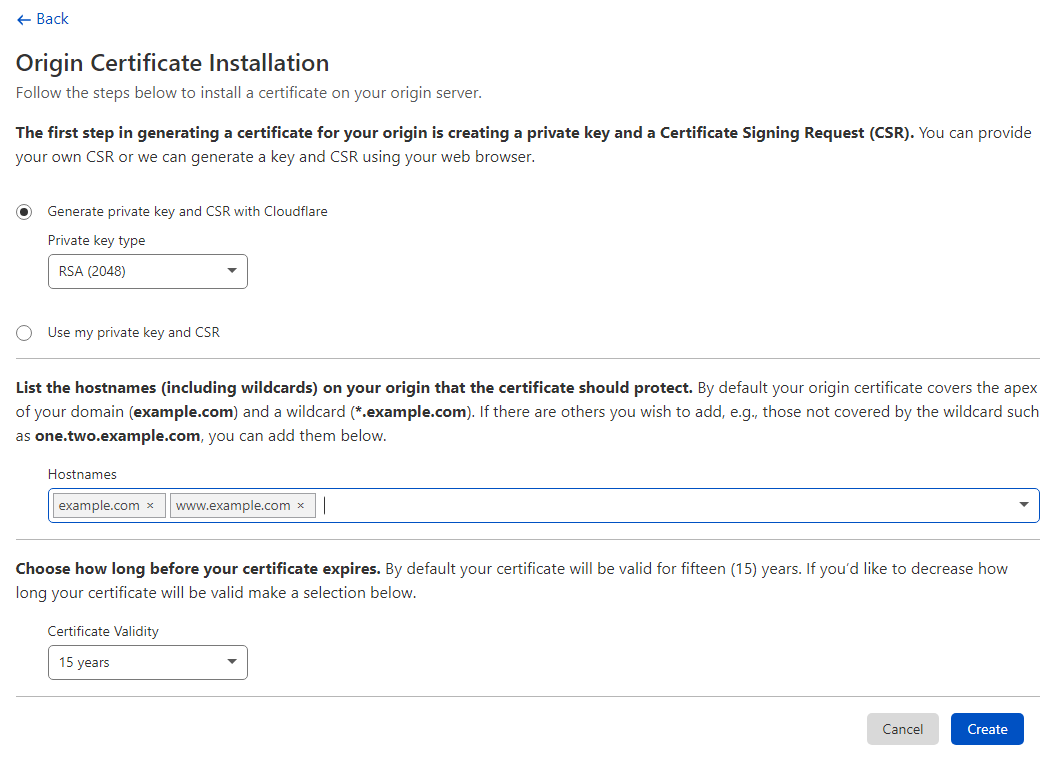
- select Generate a private key and a CSR with CloudFlare, in Private key type select RSA (2048)
- if you want to configure a domain (e.g., example.com), enter in List the hostnames your domain (example.com). If you also want to configure the www. subdomain, please enter it in the list (www.example.com).
- Alternatively to step 10, if you want to configure a subdomain/third-level domain (e.g., go.example.com), enter the full subdomain/third-level domain in List the hostnames.

- WARNING: enter only the hostnames corresponding to the custom domain in JotUrl, all certificates containing other domains will be discarded. Examples:
- mycustomdomain.com → correct
- mycustomdomain.com, www.mycustomdomain.com → correct
- go.mycustomdomain.com → correct
- www.mycustomdomain.com → wrong
- mycustomdomain.com, www.mycustomdomain.com, *.mycustomdomain.com → wrong
- mycustomdomain.com, www.mycustomdomain.com, anotherdomain.com → wrong
- go.mycustomdomain.com, www.mycustomdomain.com → wrong
- go.mycustomdomain.com, anotherdomain.com → wrong
- leave the Certificate Validity unchanged (it should be 15 years).
- Click on Next.
- Select PEM in the Key Format.
- Copy the signed Origin Certificate and Private key details into separate files (for example certificate.txt and private.txt, respectively). Don't forget to copy the headers, the files must be in the form:
----- BEGIN CERTIFICATE -----
...
----- END CERTIFICATE ----- - Click here to download the Cloudflare Origin CA root certificate
- Now that you have the private key, the certificate and the CA root certificate, navigate to SSL certificates on JotUrl.
- Click on Add new certificate/domain association in the upper right corner, a dialog will appear
- select your domain/subdomain in Domain associated with the certificate
- check I have the private key file, the cert file, root and intermediates certificates (PEM)
- upload your private key (private.txt) in Private key (PEM), your certificate (certificate.txt) in Certificate (PEM) and your CA root certificate (ca.txt) in CA Certificate #1 (PEM).
- click on Save to install the certificate.
Please note that CloudFlare Origin Certificates are only valid for encryption between Cloudflare and our servers, they are not trusted in any browsers. In other words, this flow will work:
user → click → CloudFlare → Origin Certificate on JotUrl → CloudFlare → user
But this one will not work:
user → click → Origin Certificate on JotUrl → SSL error (HTTP 503)
Comments
0 comments
Article is closed for comments.