
Webhooks are one of the ways apps can "talk" to each other and receive notifications automatically when something new happens.
From a technical point of view, webhooks are automatic messages sent by apps when something happens. They have a message, also called a payload, which is sent to a unique URL.
What are webhooks for on our platform?
Webhook helps you to get notified as soon as someone takes a desired action on our platform. A Webhook enables our service to send automated information to another application/web server, whenever an event takes place, in real-time.
Available webhook events in JotUrl
Any change that occurs on an application or a system is considered as an event. Here are some default events that we provide:
1. Form CTAs Lead Generation (CTA event)
Get notified with your leads information. Whenever someone fills a CTA form that you have attached to your tracking links, you’ll receive a notification, with their details. You can also choose to immediately update the lead information in your CRM platform.
2. Social Optin/Social Optin XL CTAs Lead Generation (CTA event)
Get notified whenever someone provides his/hers social login on Social Optin/Social Optin XL CTAs that you have attached to your tracking links. You can also choose to immediately update the lead information in your CRM platform.
3. Tracking link creation (project event)
Get notified whenever a new tracking link is created.
Available Webhooks for CTAs
We currently support the synchronization of your data with the following third party services:
In addition, we support the custom webhooks with which you can send data to your server; see below for details.
How to configure/edit a webhook for your CTA
Login into your JotUrl dashboad, navigate to the CTA section of the dashboard, identify the CTA Form, Social Optin, Social Optin XL with which you want to associate the webhook, click on the "three dots" on the right and click on "Set webhook" or "Edit webhook." NOTE: only one webhook can be associated for each CTA.

Select a third party service from the list and configure its settings by following the instructions on the screen. All the information entered is encrypted before being stored.
How to remove a webhook from your CTA
Login into your JotUrl dashboad, navigate to the CTA section of the dashboard, identify the CTA Form, Social Optin, Social Optin XL from which you want to remove the webhook, click on the "webhook" icon and confirm deletion.
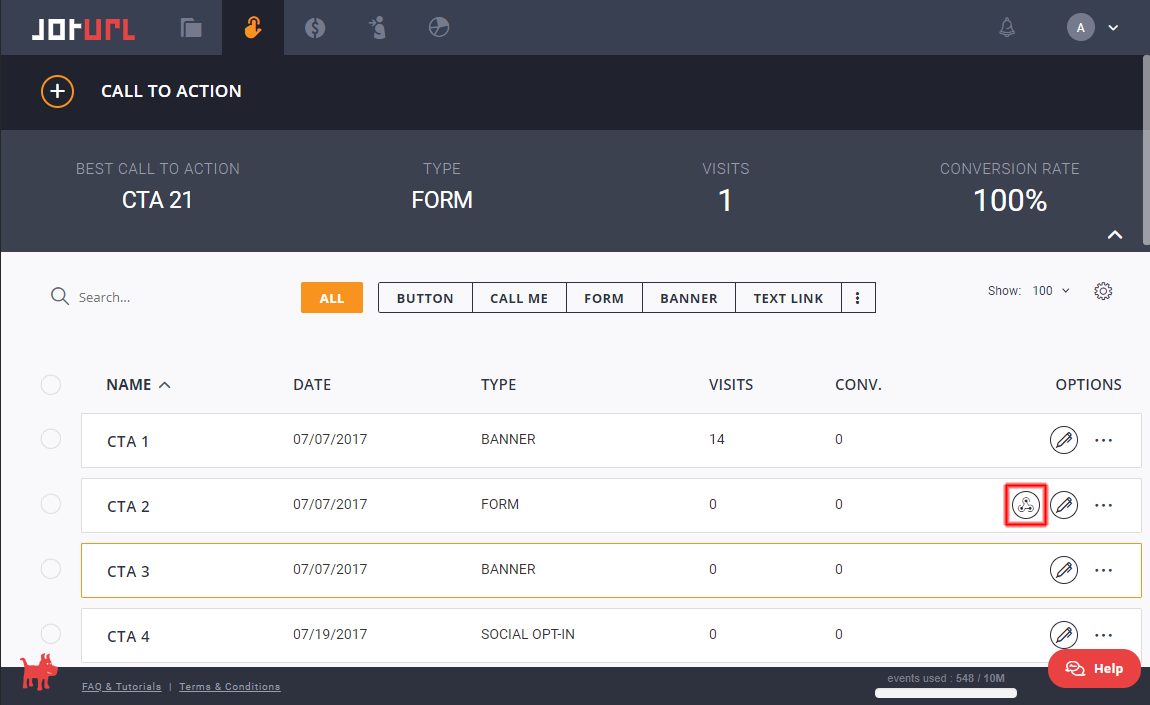
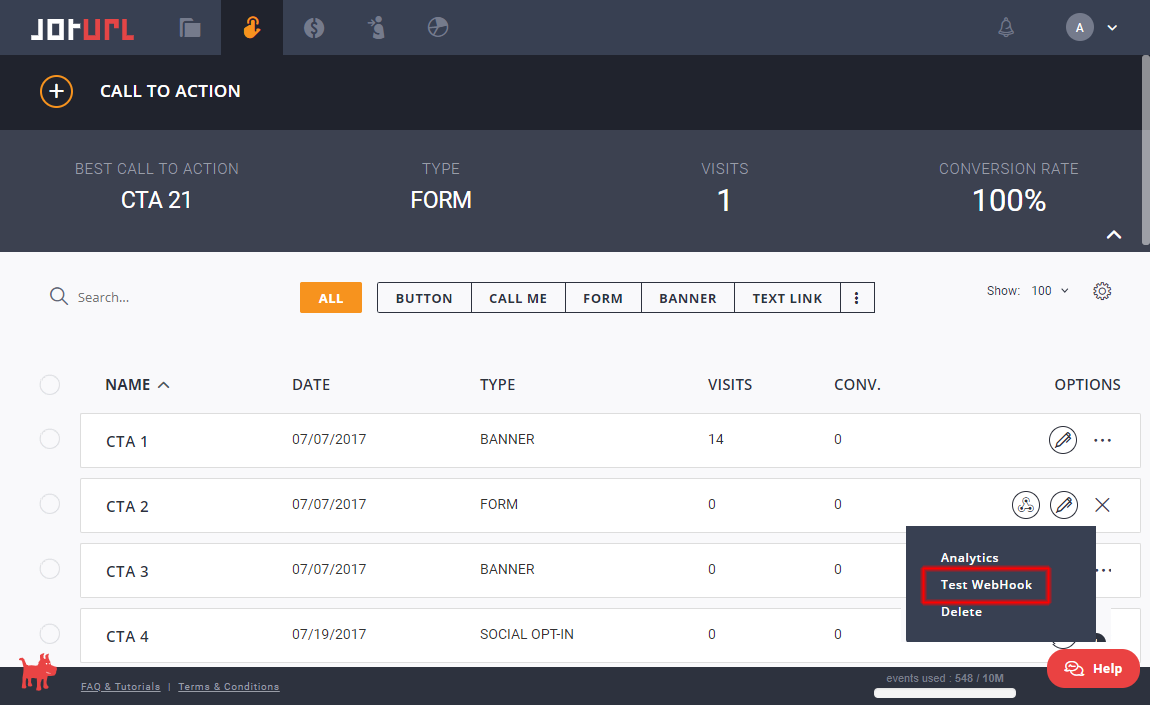
How to test the webhook URL of your CTA
Login into your JotUrl dashboad, navigate to the CTA section of the dashboard, identify the CTA Form, Social Optin, Social Optin XL for which you want to test the webhook, click on the "three dots" on the right and click on "Test webhook." After confirmation, sample data will be send to the webhook associated with the CTA.
Available Webhooks for projects
We currently support the following third party services:
Furthermore, we support custom webhooks with which you can notify your server of the creation of the tracking link; see below for details.
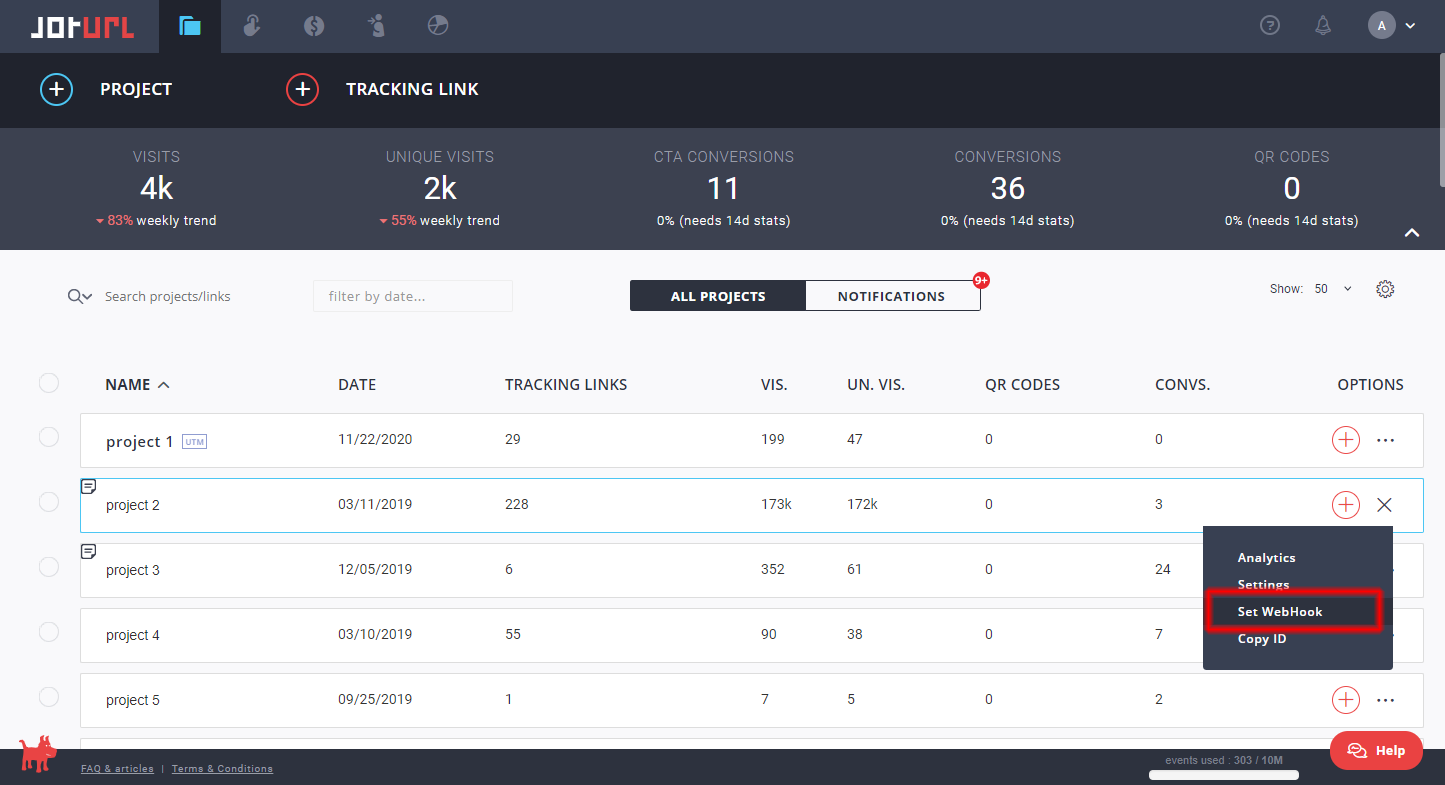
How to configure/edit a webhook for your project
Login into your JotUrl dashboad, navigate to the project section of the dashboard, identify the project with which you want to associate the webhook, click on the "three dots" on the right and click on "Set webhook" or "Edit webhook." NOTE: only one webhook can be associated for each project.
Select a third party service from the list and configure its settings by following the instructions on the screen. All the information entered is encrypted before being stored.
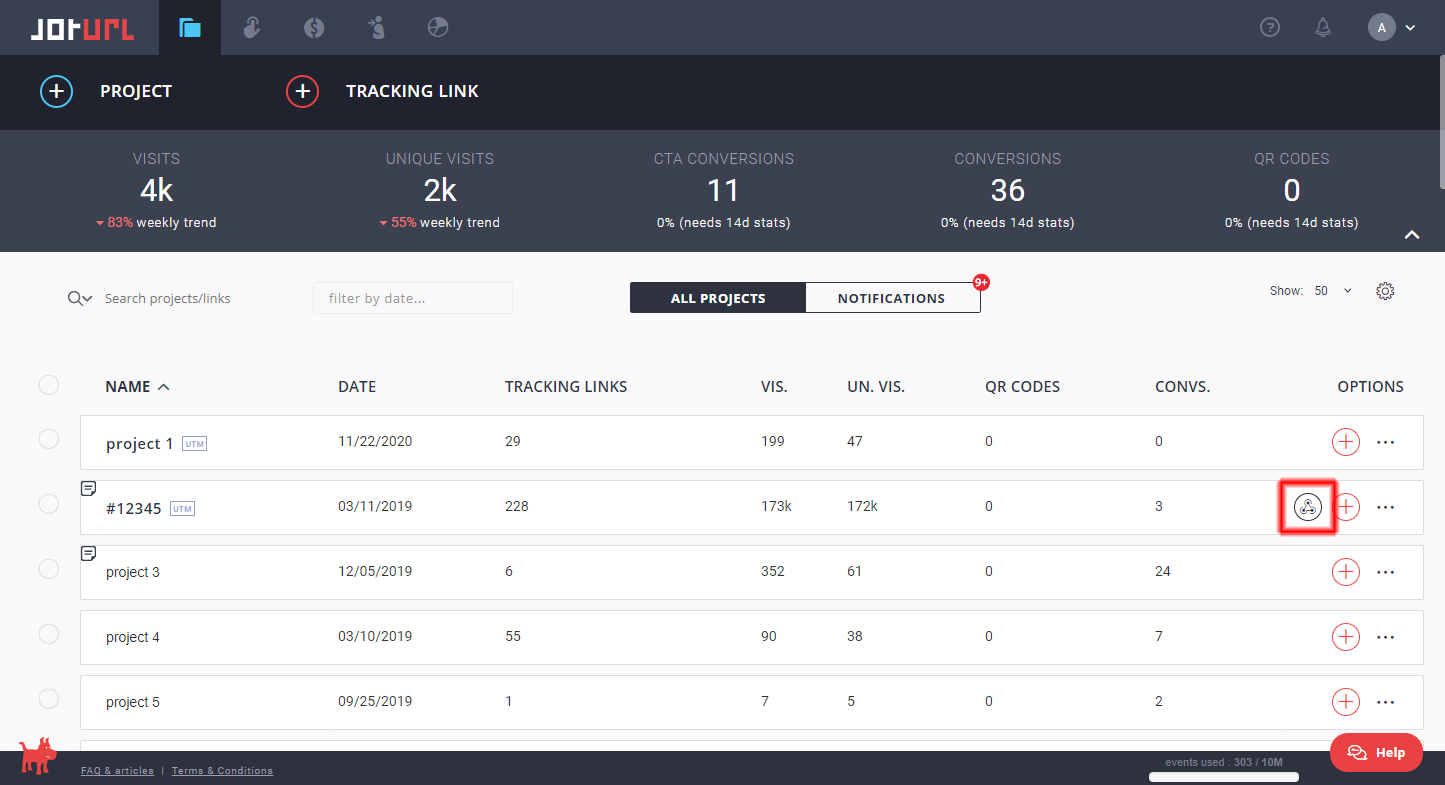
How to remove a webhook from your project
Login into your JotUrl dashboad, navigate to the project section of the dashboard, identify the project from which you want to remove the webhook, click on the "webhook" icon and confirm deletion.
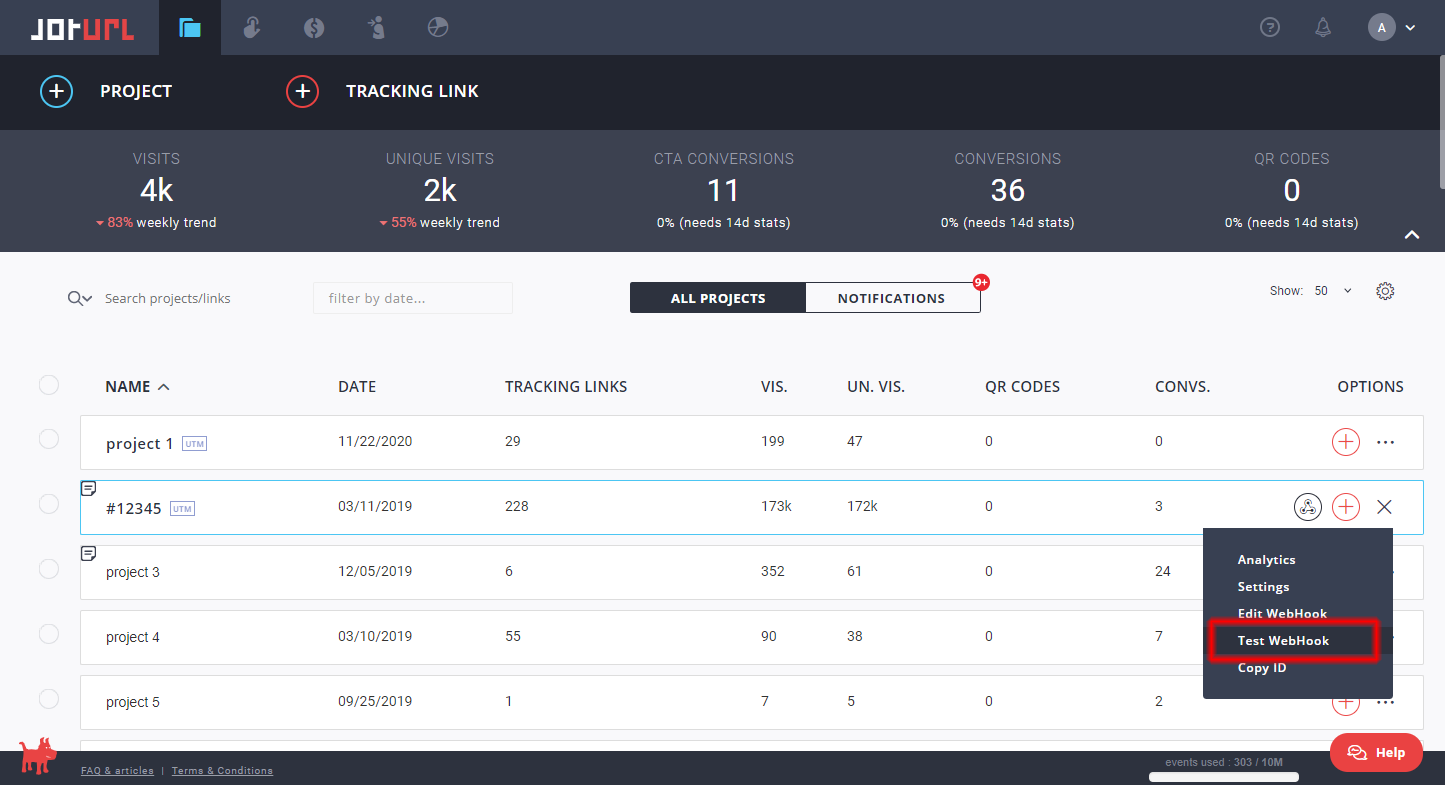
How to test the webhook URL of your project
Login into your JotUrl dashboad, navigate to the project section of the dashboard, identify the project for which you want to test the webhook, click on the "three dots" on the right and click on "Test webhook." After confirmation, sample data will be send to the webhook associated with the project.
Custom webhooks
When one of the events described above occurs, our system sends a POST message to the URL of the custom webhook. Here are some examples of messages.
Example webhook message for Form CTAs
{
 "data":"john.smith.1257121140@example.com",
 "type":"email",
 "date":"2020-03-26",
 "name":"John Smith"
}
The type parameter can be email or other depending on whether data is an email or something else, in fact Form CTAs can collect various types of data. Parameter type is always equal to email for Social Opt-in/Social Opt-in XL CTAs.
Example webhook message for Social Optin/Social Optin XL CTAs
{
 "data":"john.smith.1257121140@example.com",
 "type":"email",
 "date":"2020-03-26",
 "name":"John Smith",
 "extended_info":"{}"
}
The type parameter is always equal to email. The extended_info parameter contains a JSON object converted into a string, this string represents additional information about the data collected by the Social Opt-in and Social Opt-in XL CTAs.
Example webhook message for tracking link creation
{
 "id":"342352536456456",
 "alias":"joturl",
 "domain_id":"67567567567567657",
 "domain_host":"jo.my",
 "domain_nickname":"",
 "project_id":"697897897897898",
 "project_name":"project #1",
 "short_url":"https:\/\/jo.my\/joturl",
 "long_url":"https:\/\/www.joturl.com\/",
 "notes":"",
 "tags":"",
}
The message contains also all additional parameters defined into the custom webhook.
Security checks on custom webhook URLs
For security reasons, our system does not accept all URLs as a webhook. In order to use a URL as a webhook, you must prove that you are the owner of that URL or that you are authorized to use it. To do this, follow these steps:
1. Let's assume this is your webhook URL
https://my.domain.example.com/webhooks/cta/
2. To prove ownership of the domain my.domain.example.com, you need to change its DNS records and add a new TXT record that contains the string
joturl-domain-verification=sdRoKPD9FyAnQJezy3Rz.jm0Izf3nUjQuWsw3rsoJ
You can add a new TXT record in a similar way as written here for A/CNAME records.
Simple codes to read a custom webhook message
The webhook message can be read, on the server side, in various languages. Here are some examples.
PHP Example
<?php

// read POST data
$message = file_get_contents('php://input');

// is the message OK?
if (!empty($message)) {
    // convert the message into an PHP associative array
    $message = json_decode($message, true);

    // process the webhook message, for example inserting it in the DB,
    // creating a file or adding the data sent in a CSV file.
    print_r($message);
}
Python Example (using Flask framework)
# import main Flask class and request object
from flask import Flask, request
import json

# create the Flask app
app = Flask(__name__)

@app.route('/webhook', methods=['POST'])
def webhook():
    # process the webhook message, , for example inserting it in the DB,
    # creating a file or adding the data sent in a CSV file.
    j = json.loads(request.data)
    return 'received:' + json.dumps(j)
Node.js Example (using Express framework)
var express = require('express');
var app = express();

// Parse URL-encoded bodies
app.use(express.urlencoded({
	extended: true
}));
// Parse JSON-encoded bodies
app.use(express.json());

app.post('/webhook', function (request, response) {
	// process the webhook message, for example inserting it in the DB,
        // creating a file or adding the data sent in a CSV file.
        console.log(request.body);
        response.sendStatus(200);
});
WARNING: do not execute tasks that are too long while processing webhooks, you have a few seconds to return a response to our engine which otherwise closes the connection due to timeout.
Comments
0 comments
Article is closed for comments.